Contributing to the Git Repositories
The VIVA+ models and associated resources (validation catalog, robustness tests, etc) are maintained on git repositories. You will find step-by-step instructions on how to bring in your contribution into the VIVA+ repositories on this page.
Introduction to Git: VIVA+ Workshop
A brief introduction to Git and workflow using branches can be found on the VIVA Workshop handouts
Installing and Configuring Git
Download and install Git for Windows. You will be able to use Git from PowerShell, Git Bash, and Anaconda Command Prompt after you install. It is recommended to keep the defaults during installation.
Use your package management system to install and update Git.
sudo apt-get install git
Easiest way is to install Homebrew and run the following:
> brew install git
To update your Git install, use Homebrew’s upgrade option:
> brew upgrade git
Graphical installer for Git on macOS is available at the official Git website.
Configuring your Git installation
Before you use Git for the first time, you will need set up your name and email address. Run the following commands with your name and email address
> git config --global user.name "FirstName LastName"
> git config --global user.email "name@email.com"
Step 1: Clone the model
(Skip this step if you alrady have the VIVA+ repo on your computer)
git clone https://openvt.eu/fem/viva/vivaplus.git
Step 2: Start an Issue
Start an issue on the online repo to let other users know and discuss the changes you propose.
Step 3: Make a Branch to work on
Making a branch from master branch!
Create a branch BranchName for your development.
git checkout -b BranchName
Git commands for branches
git checkout -b BranchName is shorthand for:
git branch BranchName
git checkout BranchName
Step 4: Saving your work as you go: Commit
Use git add to stage the files you want save (to index/staging area) and then git commit to take a snapshot of the staging area
git add FileNames
git commit -m "Commit message heading"
Guidelines for making commits
- Stage related files together from the working directory and perform the commit, rather than staging all the changed files for a bulk commit
- Follow the commit message guidelines for VIVA+ models (read below)
How to write a commit message
- The commit heading gives a brief overview of changes involved
- Specify the context of the change, for example, repository section (Model:, Docs:)
- Commit message: If you would like to write more details of the commit, use the commit message body
A brief introduction to making git commit can be found in the VIVA+ workshop handouts
Step 5: Push your branch to the online repo
Make your commits available on the online repo so that it has a backup and also visible to other developers.
git push origin BranchName
Warning: Before you push
Some applications interfere with git push and cause merge conflicts.
Please close these applications before you merge branches to avoid merge conflicts.
Applications to close:
- Microsoft Excel (if you have a CSV file open)
- JabRef (if you use it to edit BibTeX files)
Step 6: Run the Models
Getting the updates from master
The model may have had updates while you worked on your changes and it is a good practice to test run your changes along with the updates on the model.
To merge the updates from the master branch into your branch, first make sure the Git HEAD is on your branch
git checkout your-branch-name
Then merge the updates on the master into your branch
git merge master
Model Tests
Work in Progress
These model tests will be run to verify the performance and response of the model
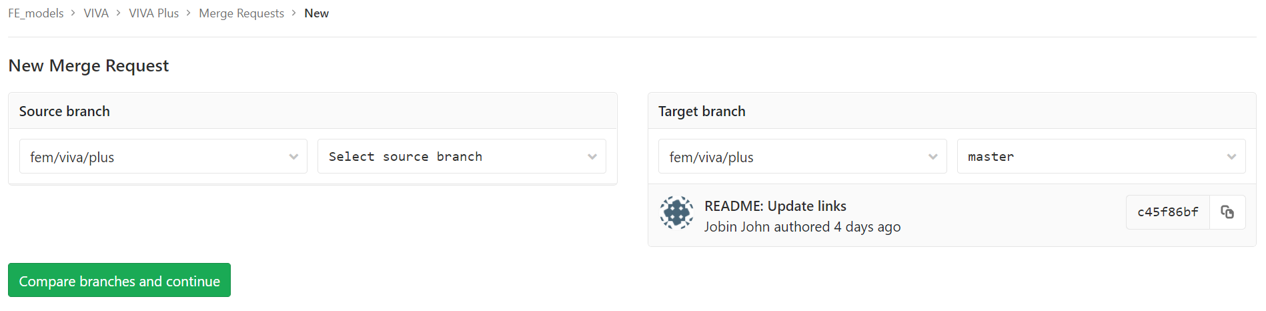
Step 7: Merging your updates to the master branch
Once your changes are available on the online repo, you are ready to submit a merge request to the maintainer for review and merging to the master branch.

Select the branch you want to merge as the source branch and master as the target branch